Showing posts with label Baby. Show all posts

Monday, August 13, 2012

Zebra-striped Dresses

I'm trying (unsuccessfully!) to post more often than once a month, but it's not working out that way! I'm doing LOTS of crafting, just haven't taken the time to post. Hope I still have some viewers out there!!!

I made these dresses for a baby shower and LOVE how they came out!
I cut them with Baby Steps Cricut Cart at 4" and the box is 1 1/2" x 1 1/2"... perfect for a little bunch of candy wrapped in tulle!

Here's a pic of the table they were set on at the shower...


Hope you all are enjoying your summer and getting lots of crafts done!

Friday, July 6, 2012

More Monkey Business

Just a quick post today... I'm making some more baby shower goodies for another friend.

These ones are 11 1/2" monkeys. They are for table centerpieces and are on a dowel about 19" long. Oh, and each monkey is double sided!
Hope you all had a fun and safe week! Thanks for stopping by!

Wednesday, June 20, 2012

Just Monkey-ing Around!

A quick post to share the baby shower favors I'm making for a shower my sister is throwing...


I used SU and SEI Dill Blossom papers, Cricut's Create A Critter, and SU cellophane bags. I filled the bags with Skittles for the sample but I think I'll go to a candy shop and get those cute little banana-shaped hard candies for the shower!

Tomorrow is the last day of school for my kids (YAAAYYY!!) so I'm hoping to get more time to post.... Thanks for hanging in there with me!

Saturday, April 7, 2012

Banners

Here are some photos of the banner I made my new granddaughter!


I used the "Lucy" paper collection from CTMH and embellishments from my stash. I also used the Kate's ABC's Cricut cartridge to cut out the letters and SU ribbon to tie it all together!

Happy Easter!!

Sunday, February 26, 2012

Presidents and a Tu-Tu!

My original plan was for this Blog to be used for just my cards and papercrafts, but as I get deeper and deeper into crafts, I'm feeling the need to share some other stuff.... Stuff I NEVER thought I would get into!!

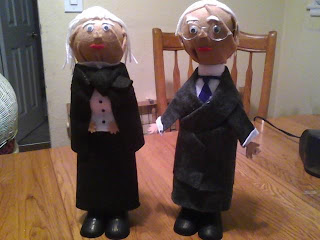
The 1st thing I want to share is one of the craziest projects any of my kids have had to do that I can remember! My 5th grader did a President report on Andrew Jackson, and she had to make a doll out of a soap bottle. Although this isn't something I'm looking forward to doing again (which WILL happen next year with my youngest daughter!), we were pretty proud of what we came up with!
This is supposed to be Andrew Jackson and Franklin D. Roosevelt!!
The next thing I want to share is quite possibly the cutest thing I've ever made!!!
After a visit to one of our local craft stores, Tall Mouse, I couldn't resist trying my hand at tu-tu's!!
This will be for my granddaughter that is due sometime in March, Arianna Lucille (I'm going to call her Lucy!)

In honor of my little Lucy and back to papercrafts, I just wanted to throw a picture of some of the ladies I got together with to make an 'I Love Lucy' mini album!
Thanks for stopping by!!

Wednesday, January 25, 2012

Tutorial: Square Box

I'm making Baby Bottle party favors for my daughter's baby shower and I had the hardest time finding a template for the box part of it, SO.... I decided to make my own and pass on the 'formula' in case anyone had the same problem!!

Here is the Baby Bottle...
I began with cutting out 2 bottles from my Cricut New Arrival cartridge at 4 inches. For the box in the middle, I looked high and low for a 1 1/2" square box template and just couldn't find one!! So after lots of playing and cutting, I came up with this....

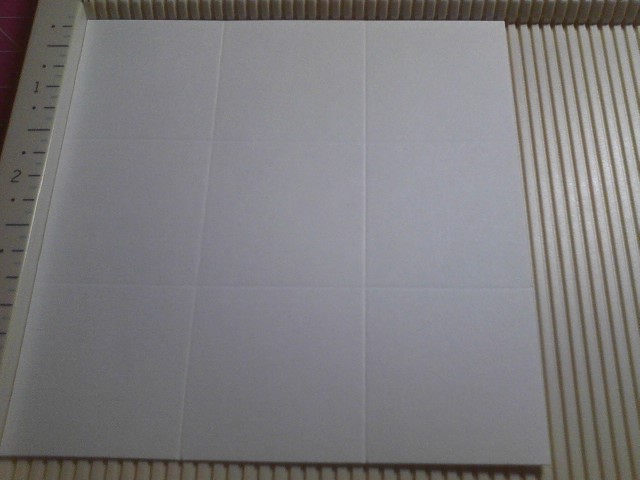
For a 1 1/2" box, cut out piece of paper (I used white cardstock) at 4 1/2" x 4 1/2", and score horizontally and vertically at 1 1/2" and 3" like this....
If you want to make the box a different size, just make the measurements 3x the size you want the box, for example, if you want a 2" sq. box, you would cut the square to 6"x6" and score it in thirds (@ 2" and 4").

The next step is hard to explain but you cut tabs on the right of each middle square and then cut off the remainder of that side square......
After this, all you do is fold up at all the scores, and the box will kind of automatically fold into a box shape when you push the sides up....
 
I found that the easiest way to adhere the sides together is to flip the paper on its back and put the adhesive on each tab, and then flip it back over to where you can stick the sides in place....

I used my ATG but you can obviously use any adhesive you like (Glue Dots, Scrappy Glue, etc...). When you're finished you'll have a cute little box!!
I put Glue Dots on the 4 corners of 2 opposite sides and stuck a bottle to each side, and THERE YOU HAVE IT!! Any theme can be used like sports, birthdays, weddings... the possibilities are endless!!! Here's a Boy Bottle I made just for fun!
I know this may be a basic concept for some, but I really struggled with it! So if it helps even one person, then I'm happy!!

I'd love it for someone to try it and let me know how my directions worked for you!!

PS... If you made a bigger one with a 5 1/2"x 5 1/2" box, you could even use this to put a small pack of handmade cards in and give as a New Baby gift!!